
 Since I have seen the Tarte au Citron at "The Great British Bake Off", I have wanted to bake it. However, last weekend at my parents' house, I discovered that the little orange tree was full of very cute little baby oranges. They taste pretty sour, but smell absolutely delicious and orangey and because
they are so small and the zest is so thin, you can eat them whole like kumquats.
Since I have seen the Tarte au Citron at "The Great British Bake Off", I have wanted to bake it. However, last weekend at my parents' house, I discovered that the little orange tree was full of very cute little baby oranges. They taste pretty sour, but smell absolutely delicious and orangey and because
they are so small and the zest is so thin, you can eat them whole like kumquats. I had just read about how someone candied lilac flowers, and had the idea that sour oranges would be the perfect candidate for being candied - I usually find candied fruits way too sweet! So the baby oranges came to Munich with me and were candied here. When I also found some juice oranges in my organic delivery box, I spontaneously started the project "Tarte à l'Orange". Because I wanted to try different decorations, I baked 4 small tartlets rather than one large tart. The dough for the pastry base is from my rhubarb chocolate tart, the filling from Mary Berry's Tarte au Citron, only with oranges instead of lemons. Next time I might use a little less sugar, because the oranges are sweeter than lemons of course. But that did not bother anyone except me ;-)
Ingredients for 4 tartlets:
175 g flour
25 g cocoa
1 egg
1 pinch salt
100 g cold butter
70 g sugar
zest of 1/4 orange
25 g cocoa
1 egg
1 pinch salt
100 g cold butter
70 g sugar
zest of 1/4 orange
For the filling:
5 eggs
125 ml double cream
225 g sugar
juice and zest of 3 oranges (instead of 4 lemons, as 1 lemon: 50-60 ml / 1 Orange: 80-100 ml)
candied baby oranges
Preparation:
I used this recipe for candying normal oranges as a guide, but because my oranges were so small and delicate, the process went much faster.
 Wash the oranges with hot water and cut them into slices (because it's pretty for decorating, but I used a few oranges whole and that has also worked well).
 Boil
the water and sugar in a pot until 100°C are reached (since I'm still
lacking a candy thermometer, the meat thermometer had to serve).
Boil
the water and sugar in a pot until 100°C are reached (since I'm still
lacking a candy thermometer, the meat thermometer had to serve).
 Place the oranges in a colander and hang it into the sugar syrup.
 Remove
the pan from the heat and leave the orange slices in the syrup for 24 hours, covered as tightly as possible with a circle of baking paper.
Remove
the pan from the heat and leave the orange slices in the syrup for 24 hours, covered as tightly as possible with a circle of baking paper.


Put all the ingredients for the pastry into the KitchenAidand knead them to a smooth dough.
 Put the dough into a sandwich bag and refrigerate for about 1 h. Preheat the oven to 175°C. Cut the chilled dough into four parts, roll and line the tartlet molds with it.


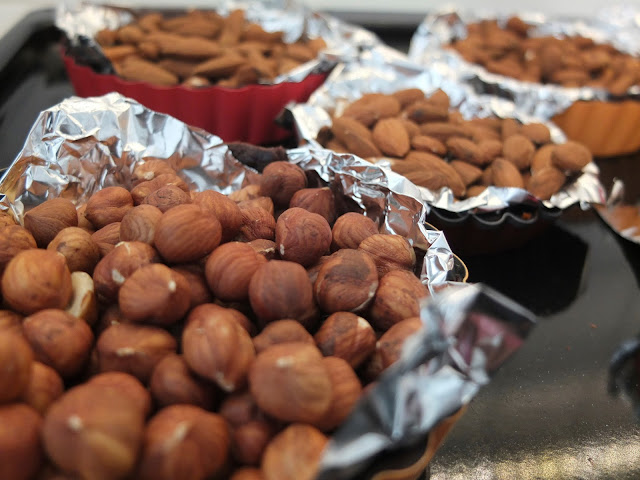
 Line the
tartlets with aluminum foil and blind bake them for about 6 minutes, I used almonds and hazelnuts as a filling again, which I could then use "preroasted" for the granola bars I made the next day.
Line the
tartlets with aluminum foil and blind bake them for about 6 minutes, I used almonds and hazelnuts as a filling again, which I could then use "preroasted" for the granola bars I made the next day.
 Remove the aluminum foil and the nuts and bake the tartlets for about 8 minutes or until they look dry on the inside. Remove the tartlets from the oven and let them cool slightly.
 Peel off the skin of the oranges with a zester and squeeze the oranges.
 Stir the
filling ingredients with a whisk, then pour it into the tartlets and
bake for about 20 minutes, they should still be slightly wobbly in the
center.
Stir the
filling ingredients with a whisk, then pour it into the tartlets and
bake for about 20 minutes, they should still be slightly wobbly in the
center.
 To
avoid that the filling spills out of the mold or between mold and tart edge during transportation into the oven, you can also pour the
last bit of the filling into the mold while the molds are already in the oven!
To
avoid that the filling spills out of the mold or between mold and tart edge during transportation into the oven, you can also pour the
last bit of the filling into the mold while the molds are already in the oven!
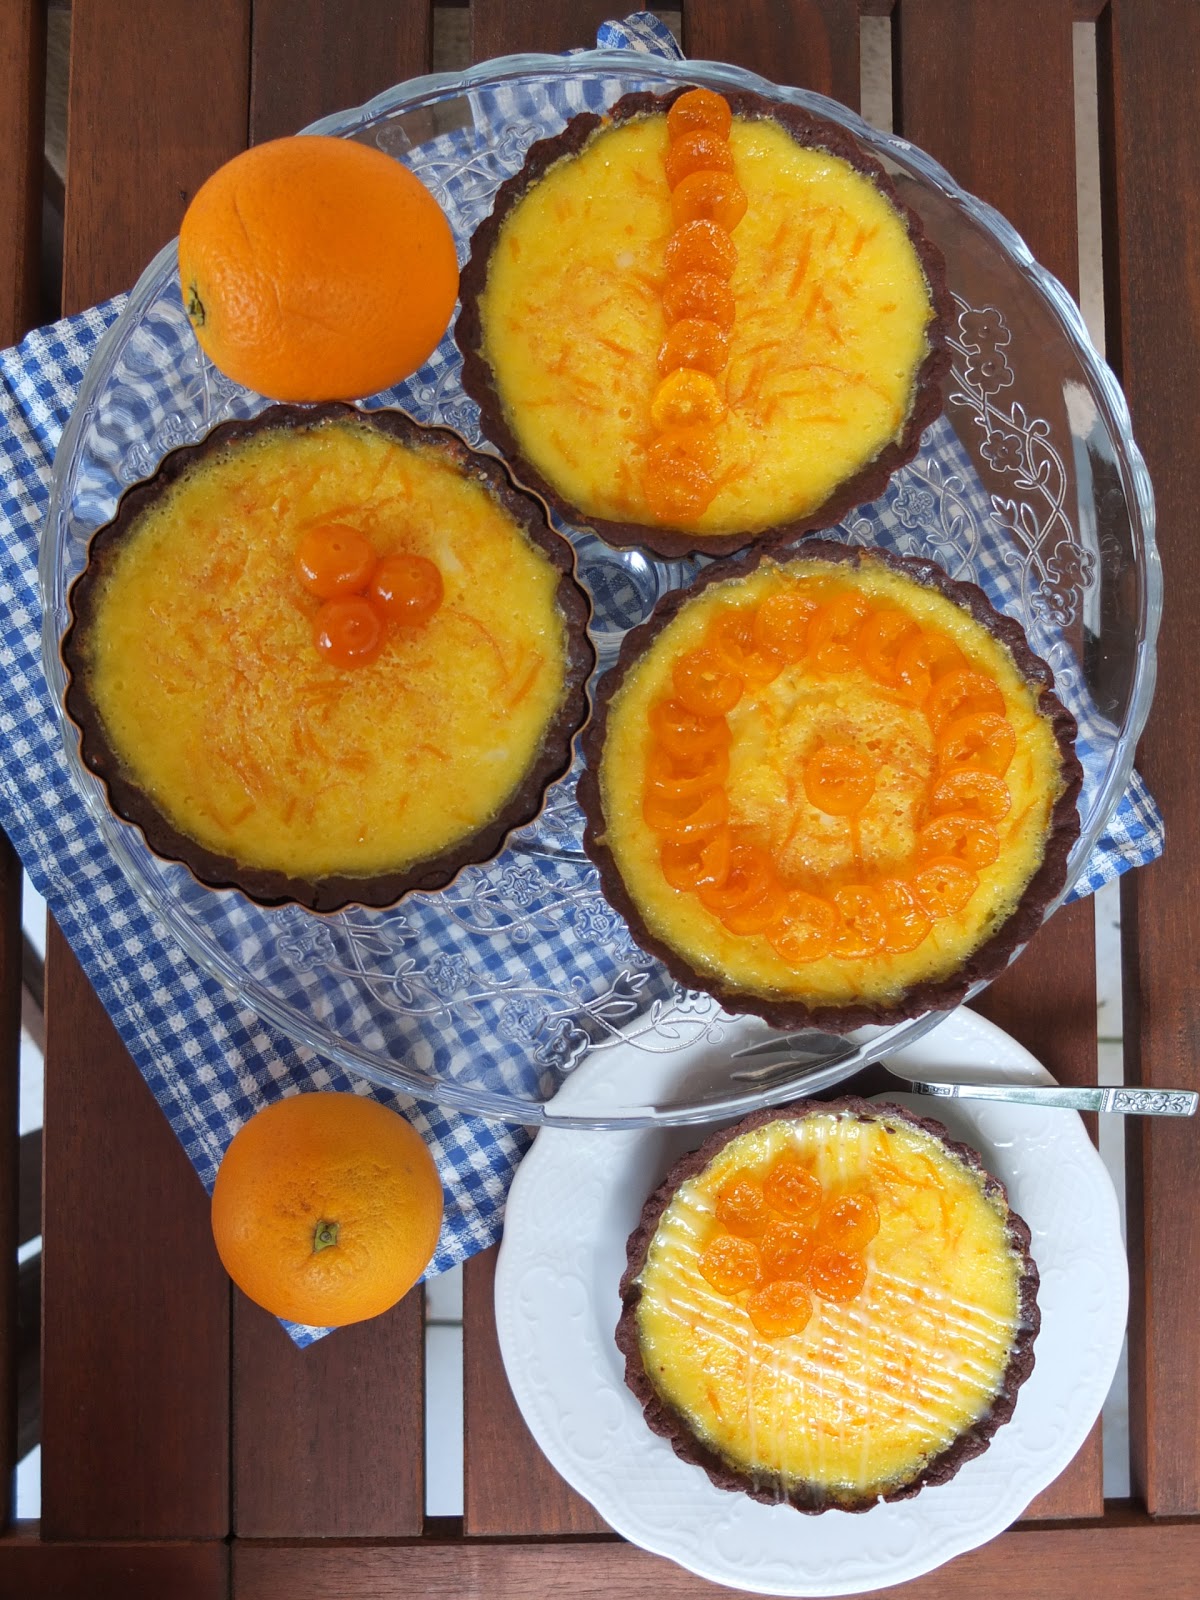
 Garnish the
finished tartlets with the candied oranges - I tried that also before baking, but the
pieces went under in the liquid filling, see middle tartlet...
Garnish the
finished tartlets with the candied oranges - I tried that also before baking, but the
pieces went under in the liquid filling, see middle tartlet...
 Let the tartlets cool slightly in the molds and then remove them. The filling will only get firm once the tartlets have cooled completely.
 I decorated the tartlet with the stripes with some crème fraîche and then put it back into the oven for a few minutes.
 The tartlets even survived the journey on the racing bike just fine ;-)

 But of course, I took a couple of photos before to be on the safe side ;-) Bon Appétit!

125 ml double cream
225 g sugar
juice and zest of 3 oranges (instead of 4 lemons, as 1 lemon: 50-60 ml / 1 Orange: 80-100 ml)
candied baby oranges
Preparation:
I used this recipe for candying normal oranges as a guide, but because my oranges were so small and delicate, the process went much faster.


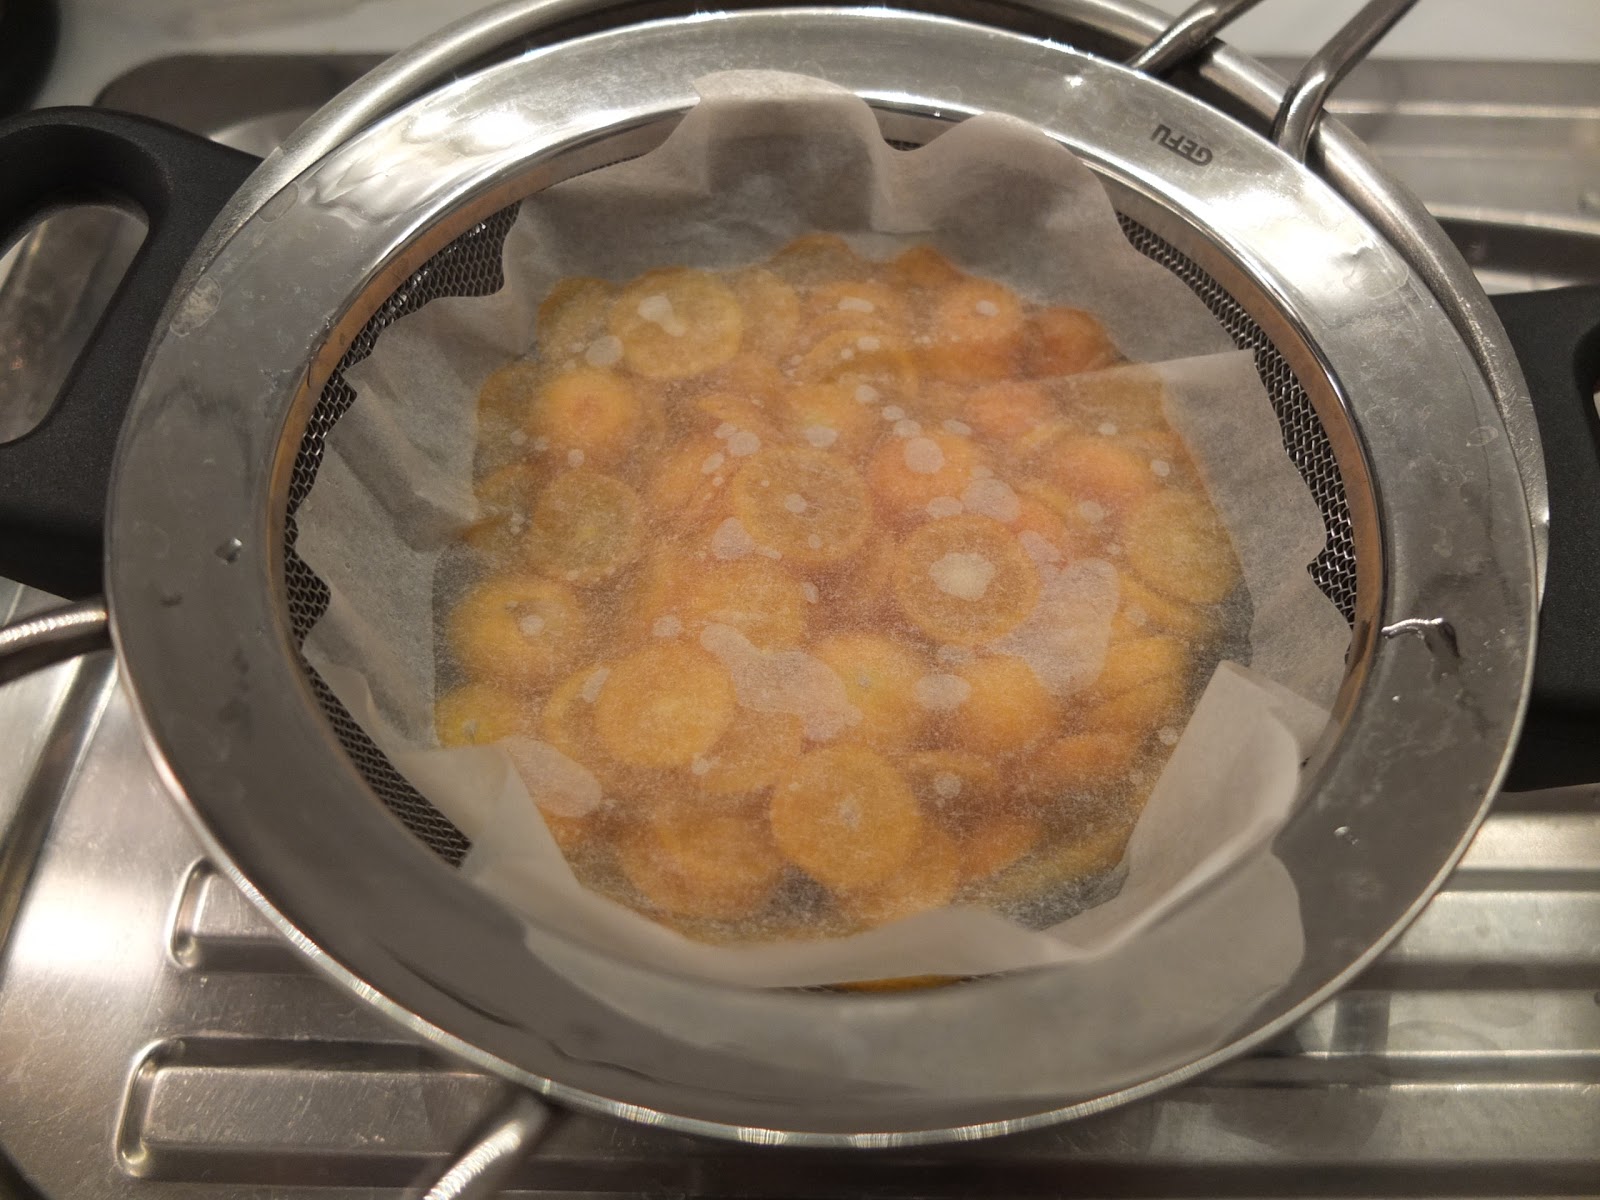
Then remove the colander from the syrup and drain the orange slices well. Leave them on a baking sheet for about 1 day to dry - for the tartlets, I used them directly from the syrup. To keep them longer, you can dry the oranges in the oven at about 60°C and keep them in a glass jar.

Put all the ingredients for the pastry into the KitchenAidand knead them to a smooth dough.


As
with a large tart, I used the removable bottoms of the molds by rolling out the dough on the bottom, then I folded up the sides of
the dough, put the bottom into the mold and pushed up the sides.

I used the dough the cut-off at the edges again for one of my old and yet smaller tartlet molds. Dock the bottoms with a fork and refrigerate for another 15 min.


Dein Blog ist so toll!!! Nur hammer Sachen die spaß machen beim backen. und auch noch so süß aussehen.Und so lecker schmecken. Großes Lob und Danke fürs teilen. Tina
ReplyDeleteHi Nadine,
ReplyDeleteIch folge seit gestern Deinem Blog auf Bloglovin.Dort wird mir aber leider dieser Eintrag als letzter Eintrag angezeigt, auf der Webseite konnte ich jedoch sehen, dass du auch in letzter Zeit aktiv warst. Ansonsten bin ich schon sehr gespannt auf Deine Rezepte. Viele Grüße aus Deiner Heimat (einen Tag Urlaub), sendet Dir Simone